Games Manual V1

Unofficial Manual
First edition Mar 2021
(created by a group of HCR2 enthusiasts)
Table of Contents
- Chapter 1 - Vehicles
- Chapter 2 - In-game resources
- Chapter 3 - Maps and Cups
- Chapter 4 - Public Event
- Chapter 5 - Team Event
- Chapter 6 - Game Guidelines
- Chapter 7 - Devices and Support
- Chapter 8 - Source
Introduction
Hill Climb Racing 2 (HCR2) is the successful sequel to Hill Climb Racing created by Finnish development studio Fingersoft (Oulu, Finland). It is a 2D driving simulation that is controlled easily using two simple controls:
Brake or Reverse - Throttle (the left and right thumbs).
The game can be installed from your Mobile providers App store and played on a smartphone or on a tablet (the PC version has ceased to be maintained). Don’t be fooled by the simplicity of the game, there are so many things in the game, whilst in the heat of the battle, that could make you lose your temper, swear and could even cause you to break your device. Our advice is simple be patient with the game!!
We hope this (unofficial) Manual will help and guide you in the best way to gather in-game resources, how to manage them, which vehicles to use on different Adventure tracks, master different driving techniques, how to best drive Public Events, and our main goal is to help you drive in the Team Events.
This link will take you to Fingersoft Privacy Policy and EULA rules.
This is an Unofficial Manual created by a group of HCR2 enthusiasts!!
Enjoy playing the game and please Don’t Panic
Chapter 1 - Vehicles
In Chapter 1, we will try to describe / dissect all the vehicles used within the game listing their advantages and disadvantages. Advise which of the four vehicles features and parts should be upgraded first. We will also try to teach you the different driving techniques - wheelie, jumping, land boost etc. In this first edition we haven’t include any driving techniques, they will be covered in future editions.
There are 25 vehicles in the HCR2 = 21 you can buy with Coins, 1 you can earn from doing a Public Event (in the Moon type of Public Event you need to reach 200 Points to obtain Moonlander), and 3 special Sleds that you can not purchase, but you can use them in a limited-time public event during the Christmas time.
The vehicles in the game can be sorted into seven categories:
- One wheel vehicles - Monowheel
- Two wheels vehicles - Scooter, Motocross, Chopper, Superbike
- Three wheels vehicles - Rotator
- Four wheels vehicles - Hill Climber, Bus, Hill Climber Mk.2, Tractor, Dune Buggy, Sports Car, Monster Truck, Super Diesel, Rally Car, Formula, Racing Truck, Hot Rod, Supercar
- Caterpillar vehicles - Tank, Snowmobile
- Space vehicles - Moonlander
- Special vehicles - Christmas Sleds
Required rank for unlocked vehicles, cost and vehicle appearance:
| Rank Required | Vehicle Name | Cost | Appearance |
|---|---|---|---|
| Bronze I | Hill Climber | Free | 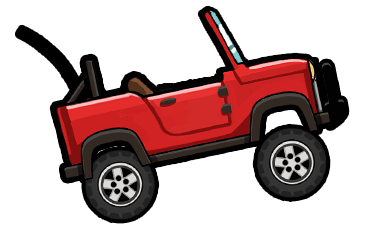 |
| Bronze II | Scooter | 5,000 Coins | 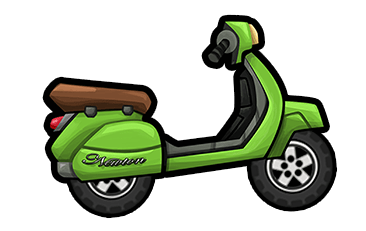 |
| Bronze III | Bus | 7,000 Coins | 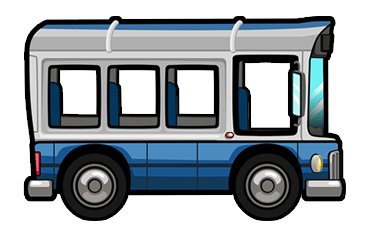 |
| Silver I | Hill Climber Mk. 2 | 9,000 Coins | 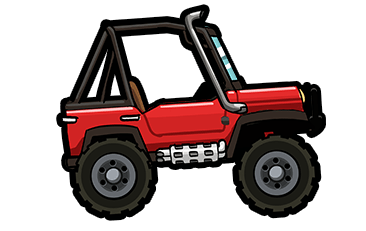 |
| Silver I | Tractor | 15,000 Coins | 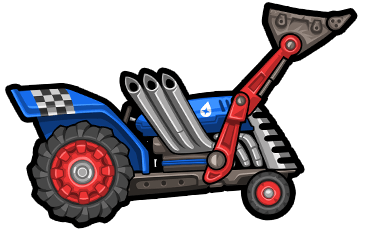 |
| Silver II | Motocross | 20,000 Coins | 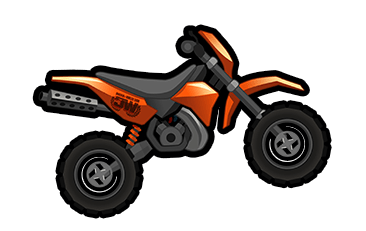 |
| Silver III | Dune Buggy | 30,000 Coins |  |
| Gold I | Sports Car | 80,000 Coins |  |
| Gold II | Monster Truck | 40,000 Coins | 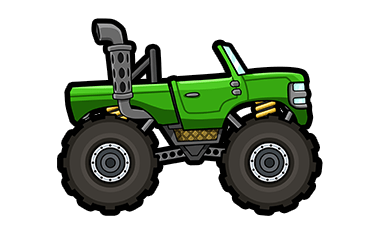 |
| Gold II | Rotator | 50,000 Coins |  |
| Gold III | Super Diesel | 60,000 Coins |  |
| Gold III | Chopper | 60,000 Coins |  |
| Platinum I | Tank | 70,000 Coins | 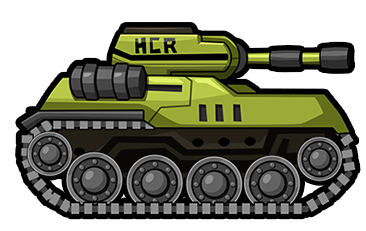 |
| Platinum I | Snowmobile | 70,000 Coins | 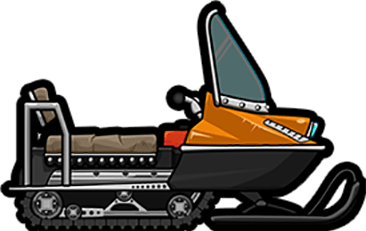 |
| Platinum II | Monowheel | 30,000 Coins | 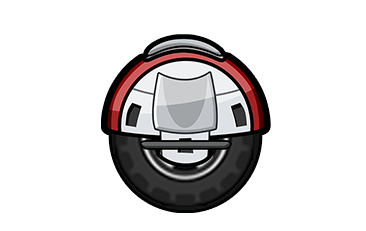 |
| Platinum III | Rally Car | 70,000 Coins | 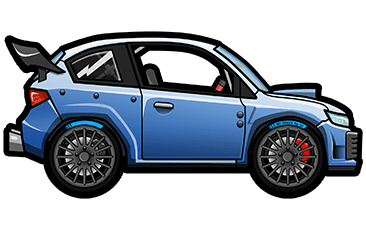 |
| Diamond I | Formula | 90,000 Coins |  |
| Diamond II | Racing Truck | 90,000 Coins |  |
| Diamond II | Hot Rod | 90,000 Coins |  |
| Diamond III | Superbike | 100,000 Coins |  |
| Legendary | Supercar | 100,000 Coins |  |
| Moon Event Reward | Moonlander | 200 Points in Moon Event | 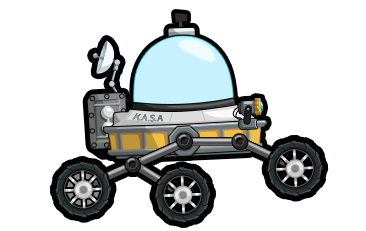 |
| Special Vehicle used for Christmas Events! | Sled | Free |  |
| Special Vehicle used for Christmas Events! | Doughnut | Free | 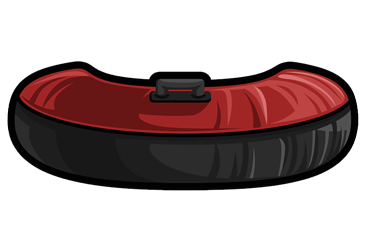 |
| Special Vehicle used for Christmas Events! | Snowboard | Free | 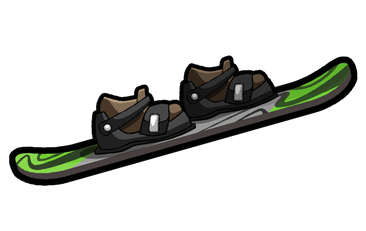 |
Vehicle Features, Tuning Parts, and Fuel Consumption
Every vehicle has 4 separate features that can be upgraded to increase its performance. These features vary from vehicle to vehicle. Each feature can be upgraded from level 1, up to level 20, with each upgrade costing progressively more coins.
With 4 features, every vehicle has tuning parts and depends on the vehicle type, a vehicle can have a minimum of 8 until a maximum of 17 available tuning parts.
There are overall 21 different vehicle features and 17 different tuning parts. To max them all out, you will need to spend 216.405.400 Coins to reach the maximum Garage Power of 9170
Description of Vehicle Features
The vehicle features can be leveled-up from level 1 to level 20 and can be adjusted by expanding the upgrades panel . The total cost of upgrading all features on all vehicles is 48.173.000 Coins.
Note!
Some vehicles can have the same 4 features (for example Chopper and Tank), some vehicles have mixed features (for example Hill Climber Mk.2, Sports Car and Rally Car) and some vehicles have one unique feature which applies only to them (for example Hill Climber has the AWD feature and the Hot Rod has the Overcharger)
One element to be aware of is some vehicles have the same feature, but that feature has a different / “extra” effect on different vehicles. For example, the Superbike and the Formula have the same feature of Downforce but it gives an “extra” effect on the Formula.
| Vehicle feature |
Description |
|---|---|
| AIR BRAKE | Braking while in the air will bring you down faster. (applies to Supercar) |
| AIR CONTROL | Improved air controls makes handling the vehicle a lot easier in jumps. (applies to Bus and Monowheel) |
| AWD | Improved All Wheel Drive results in more balanced power delivery. (applies to Hill Climber) |
| B.R.A.I.N. | This A.I chip changes the shape of the vehicle and improves handling in different situations.(applies to Rotator vehicle). This A.I chip changes the shape of the vehicle to help you brake faster, climb steep hills and drive faster. (applies to Moonlander) |
| BALANCE | Lower weight point improves stability and handling.(applies to Motocross) |
| BALANCE | Lower and more balanced frontal weight improves stability and handling. (applies to Scooter) |
| DAMAGE | Increase the amount of damage dealt to breakable objects. (applies to Tractor) |
| DOWNFORCE | Upgraded aerodynamics give a nice downforce effect. (applies to Sports Car and Superbike). Upgraded spoilers give a nice downforce effect. If the spoilers get detached, the effect is lost! (applies to Formula and Racing Truck) |
| DRAG | Improved Aerodynamics. (applies to Racing Truck) |
| ENGINE | Increases the maximum speed of the vehicle. |
| EXHAUST | Open up exhaust valves for greater acceleration. (applies to Supercar) |
| FUEL TANK | Improved fuel tank allows the vehicle to drive a longer time without refueling |
| GEARBOX | Optimized gearbox for better acceleration. |
| GRIP | Improved grip for better traction and power delivery to the ground. |
| ROLLCAGE | Protects your head! (applies to Hill Climber Mk.2 and Dune Buggy) |
| SKI WAX | Decreased ski friction and better track grip gives the vehicle higher top speed. (applies to Snowmobile) |
| STABILITY | Improved gyro allows the driver to lean back when going uphill, greatly enhancing the safety of the vehicle! (applies to Monowheel) |
| SUPERCHARGER | Gives your engine an extra power boost. Watch out for overheating! (applies to Hot Rod) |
| SUSPENSION | Lower weight point and better shock absorption to improve stability on high speeds. |
| THRUSTERS | Fly through the air (or space). NOTE: Activate by pressing both pedals down simultaneously. |
| TURBO | Improved turbo for faster acceleration and motor torque. |
Description of Vehicle Tuning Parts
Tuning parts are additional special parts that you can strap on to your vehicle before a race to give yourself an edge over the competition. They have varying effects and each part can be upgraded multiple times.
There are four different types of tuning parts: Common, Rare, Epic, and Legendary. Parts are earned by opening Chest, by playing Team and Public Events, and by completing monthly Trophy Road (more about Chest and Parts in the next version).
Each vehicle’s Garage has a total of 3 slots for tuning parts. You begin with one slot, as you progress through the game the second and third slots will be unlocked when your Garage Power is at 36 and 106 respectively.
With the recent update, v1.42.0, tuning parts can now be adjusted by expanding the upgrades panel . The total cost of upgrading all tuning parts for all vehicles is 168.232.400 Coins.
NOTE!
* Aero’s Monitoring Spreadsheet *
A very good tool for developing your HCR2 Account aka Bill Newton is Aero’s HCR2 Monitoring Spreadsheet. By using this tool, you can easily follow your in-game progress, make plans on how to spend Coins on vehicle features and tuning parts, and etc.
For downloading this spreadsheet use this Reddit link!!
https://www.reddit.com/r/HillClimbRacing/comments/jqr5nk/new_spreadsheet_v1401_with_rotator/
| TUNING PART | RARITY | ICON | DESCRIPTION | MOST USEFUL TASKS |
|---|---|---|---|---|
| Air Control | Common part |  |
Turn faster in the air | It helps to make the vehicle control more easily midair and you can use it in a team or public events for flips. |
| Heavyweight | Common part |  |
Add weight to the front of your vehicle to be able to destroy obstacles easier. | This part can be used to help keep the vehicle rooted to the ground or add extra ballast if you need to destroy items. |
| Magnet | Common part |  |
Collect fuel and coins with a wider radius. | It helps to collect Coins and Fuel in a Bigger Radius. |
| Roll cage | Common part |  |
Protect the driver from collisions. | On Cups and Adventure maps with many roofs and prevent. |
| Wings | Common part |  |
Glide through the air & increase your jump length. | Long Jump Event or Long Jumps in Adventure maps. |
| Winter Tires | Common part |  |
Increases your overall grip on all surfaces, with additional bonuses on snow and icy surfaces. | Very hilly and snowy adventure maps. Climbing difficult Hills. |
| Flip Boost | Rare part |  |
Obtain a speed boost after completing a successful flip. Note: Combining several flips at once will not give you a more powerful boost. | It helps you in team events or in public events like in coin collecting public events in which it takes boost by a flip which can make coin collecting easier. |
| Fume Boost | Rare part |  |
Obtain a powerful speed boost when your fuel is low. Note: This part cannot be activated when the vehicle is performing airtime and/or while driving backward on the map. | Adventure maps with big gaps between fuels or helps to go fast to reach the fuel slot. |
| Jump Shocks | Rare part |  |
Make your vehicle jump up into the air. Tap both pedals simultaneously to activate. | Cushion jumps on Cup Tracks or in Team events. |
| Start Boost | Rare part |  |
Performing a “Perfect Start” will activate a powerful rocket booster. | It’s good for Racing in Cups to go fast at the start of the race. |
| Wheelie Boost | Rare part |  |
Obtain a speed boost during wheelies. | Wheelie Event or in Racing Cups. |
| Afterburner | Epic part |  |
Power boost with higher fuel consumption. Note: The part is activated when you ONLY press the throttle. | It is used in time attack public events or in Racing tracks it helps vehicles to go fast. |
| Landing Boost | Epic part |  |
Obtain a speed boost after a perfect landing. | Mainly flat adventure maps or in Team events when Fuels are gone or also help in Cups to boost speed. |
| Overcharged Turbo | Epic part |  |
Holding accelerate until the boost pressure gauge sits at maximum for a long enough time will activate a short speed boost. | It is used in Time Attack Events or For Racing in Cups and also used in Adventures. |
| Coin Boost | Legendary part |  |
Obtain a speed boost when you collect coins. | Adventure maps or in Racing in cups or for Team events or also in Public events. |
| Fuel Boost | Legendary part |  |
Obtain a powerful speed boost when you obtain a fuel can. | Helps you to race in tracks or also in a public event like a time attack event. |
| Thrusters | Legendary part |  |
Rocket boosters that will make you fly at the cost of heavy fuel consumption. Press both pedals simultaneously to activate. Note: By upgrading the thruster power, you also increase the fuel consumption when in use. | It is used in Long Jump Events or mainly in Moon Jump events. |
Fuel Consumption
Because HCR2 is a driving simulation game, each vehicle has its advantages and disadvantages; every vehicle drives differently, the type of track affects how the vehicles behave, also, each vehicle has a different size fuel tank which affects the fuel consumption thereby limiting the length of time you can drive.
- Fuel canister (fills up fuel tank)
- Fuel gauge (shows how much fuel is in a vehicle)

- Low Fuel icon (when this icon shows up you are in the red part of the Fuel gauge and you need to refill as soon as possible your fuel tank, or your ride will end).
Note!
Only three vehicles in the game have a Fuel feature and thus have a longer Fuel Duration when maxing out that feature. Those vehicles are: Chopper, Tank, and Snowmobile.
Vehicle / Fuel Duration (Full tank / seconds)
hill climber / 45 s
scooter / 50 s
bus / 60 s
Mk2 / 44 s
tractor / 50 s
motocross / 42 s
buggy / 44 s
sportscar / 38 s
monster / 50 s
rotator / 46 s
superdiesel / 52 s
monowheel / 50 s
rally / 40 s
formula / 30 s
racing truck / 50 s
hotrod / 30 s
superbike / 30 s
supercar / 30 s
moonlander / 50 s
Note!
Timetable of durations for Fuel Tank feature
* chopper / Fuel Lv.1- 38 s Fuel Lv. 20 - 55 s
* tank / Fuel Lv.1- 30 s Fuel Lv. 20 - 56 s
* snowmobile / Fuel Lv.1- 30 s Fuel Lv. 20 - 56 s
*The following Table shows the fuel durations for every upgradeable Fuel Tank feature at every level.
| Lv 1 | Lv 2 | Lv 3 | Lv 4 | Lv 5 | Lv 6 | Lv 7 | Lv 8 | Lv 9 | Lv 10 |
|---|---|---|---|---|---|---|---|---|---|
| 38 s | 38.8 s | 39.8 s | 40.8 s | 42 s | 43.2 s | 44.4 s | 45.6 s | 46.4 s | 48 s |
| 30 s | 31.5 s | 32.8 s | 34.4 s | 36.2 s | 38 s | 39.8 | s 41.6 s | 43.4 s | 45.2 s |
| 30 s | 31.5 s | 32.8 s | 34.4 s | 36.2 s | 38 s | 39.8 s | 41.6 s | 43.4 s | 45.2 s |
| Lv 11 | Lv 12 | Lv 13 | Lv 14 | Lv 15 | Lv 16 | Lv 17 | Lv 18 | Lv 19 | Lv 20 |
|---|---|---|---|---|---|---|---|---|---|
| 49 s | 50.2 s | 51.2 s | 52.2 s | 53 s | 53.6 s | 54.2 s | 54.6 s | 54.8 s | 55 s |
| 47 s | 48.6 s | 50.2 s | 51.6 s | 53 s | 54 s | 54.8 s | 55.4 s | 55.8 s | 56 s |
| 47 s | 48.6 s | 50.2 s | 51.6 s | 53 s | 54 s | 54.8 s | 55.4 s | 55.8 s | 56 s |
Vehicle Descriptions
This section of the Game Manual will try to explain with the help of a player’s personal experience on how to drive the vehicle and what features and parts you need to invest in first. With each new version of the Game Manual we will add new vehicle descriptions.
Hill Climber Description by Flash and CU | Marko
Advantages of Hill Climber - Good at team events in no fuel distances and stunts. Good at adventures on some maps.
Disadvantages of Hill Climber - slow, needs good and maxed parts to be fast. Without roof.
Description Hill Climber is the first vehicle in the game and is unlocked at the start. You get it in the bronze 1 league and it’s free. It’s a vehicle that does not have high speed and high acceleration, but you can go fast if it has maximum parts …
The vehicle has a total of 21 paints and 13 types of wheels. There is no roof and you can easily die if you hit your head. It’s not the best for cups but it’s interesting to play. In adventure it is good only on some maps where there is not much climbing, e.g., forest with kangaroo tactics (wings, jump shocks and landing boost = setup for jumping mode) these are the 3 best parts for this vehicle because they are often used in team events and adventures. In team events it is good at no fuel distance and in stunt coins. Hill Climber fuel tank lasts 40 seconds.
Numerical data It costs 208,400 coins to max a single upgrade. It costs 833,600 coins to max all four upgrades. It costs 9,187,100 coins to fully upgrade all parts. It costs 10,020,700 coins to fully upgrade all parts and tunes. This does not include scrap. The money is well worth it.
Parts tips for Hill Climber:
| Good Parts | Useful | Rarely used |
|---|---|---|
| Fume Boost • Jump Shocks • Landing Boost • Wings | Air Control • Winter Tires • Start Boost • Magnet • Wheelie Boost • Flip Boost • Thrusters | Rollcage • Overcharged Turbo • Afterburners • Heavyweight • Coin Boost |
Hill Climber Setup for driving Adventures:
| Adventures | Hill Climber Setup |
|---|---|
| Countryside | Jump Shocks, Landing Boost, Wings |
| Forest | Jump Shocks, Landing Boost, Wings |
| City | Wings, Jump Shocks, Magnet |
| Mountain | Wings, Fume Boost, Winter Tires |
| Rustbucket Reef | Jump Shocks, Landing Boost, Wings |
| Winter | Jump Shocks, Landing Boost, Wings |
| Mines | Jump Shocks, Landing Boost, Wings |
| Desert Valley | Jump Shocks, Landing Boost, Wings |
| Beach | Jump Shocks, Landing Boost, Wings |
| Backwater Bog | Jump Shocks, Landing Boost, Wings |
| Racier Glacier | Jump Shocks, Landing Boost, Wings |
| Factory | Jump Shocks, Landing Boost, Wings |
Hill Climber Setup for Special maps
| Special maps | Hill Climber Setup |
|---|---|
| Moon | Jump Shocks, Landing Boost, Wings |
| Forest Trials | Jump Shocks, Coins Boost, Wings |
| Intense City | Winter Tires, Wings, Jump Shocks |
| Raging Winter | Wings, Jump Shocks, Thrusters |
If You want to contact us:
Flash contact:
Discord: Flash™#3768
CU | Marko contact:
Discord: CU | Marko#1218
Tractor Description by dada
“The King of Agricultural Equipment”
Wiki Description
- “The Tractor is a heavy vehicle that has decent speed and acceleration, is very stable and has a large fuel tank. This makes it a better choice on maps with generally flat terrain, though it is also one of the best vehicles at climbing very steep hills with the right Tuning Parts. The suspension is decent.”
- “The Tractor comes with a functional front loader that can be used by pressing both pedals (both sides of the device screen) at once, leaving it firm to the front, upwards or loose. This requires some strategy, as the loader can affect the Tractor’s balance. The loader bucket’s damage can be upgraded, making the tractor an ideal vehicle for maps that have lots of destructible obstacles, like Backwater Bog, Racer Glacier and Skyrock Outpost.”
- “Your character sits at the rear side of the Tractor, making excessive wheelies a dangerous maneuver. It is best to have the roll cage part installed to help avoid this problem”
Advantages
- Fast
- Flies well
- Large fuel tank
- Great on flat terrain and uphills
- Excellent at breaking obstacles
- Adjustable front-loader and damage level
- Powerful Overcharged Turbo
- Tractor Wars!
Disadvantages
- Without the roll cage the driver is very vulnerable especially when doing wheelies or when landing on back wheels, this is due to far back sitting position
- If not careful, the bucket has a tendency to get stuck occasionally, e.g. on rope bridges, and can flip the tractor over in an unpredictable way
- Thrusters not available
- Even though it is good at many things, it is often not the best for specific tasks
Nevertheless, it tends to be vastly underrated and is an extremely fun vehicle to drive.
Handling
- Power is delivered via the back wheels. The small front wheels provide stability but can detract from the speed of the vehicle. Accordingly, acceleration is often strongest when balancing on the back wheels.
- Having the bucket firm upfront may increase distance in the air if angled correctly, and can assist in crossing finish lines first. The bucket in upwards position provides a measure of protection for the driver e.g. when driving through a cave. Nevertheless, the vehicle often performs best when the bucket is loose.
Upgrades
- It is generally optimal to have Engine and Grip as high as possible.
- Reducing Suspension can make the vehicle lighter and therefore accelerates a touch quicker; however, this comes at the costs of reduced stability. At very low suspension levels, it is not easy to control.
- Increasing Damage makes the tractor heavier and allows it to break obstacles more easily. Nevertheless, it is sometimes best to set it as low as possible in order to lighten the vehicle and to pass over obstacles without breaking them.
Parts recommendations
- Wings, Winter Tires, and Magnet are often useful.
- Rollcage can provide good protection even if not maxed.
- Wings & Overcharged Turbo work well together. Surprising speed and distance is possible when triggering Overcharged Turbo at the same time as launching into the air.
- Cups:
- Afterburner, Overcharged Turbo & Coin Boost is often the fastest combination and upgrading these parts is highly recommended.
- Wings, Afterburner & Coin Boost is another popular combination.
- Adventures:
| Adventures | Tractor Parts |
|---|---|
| Countryside | Wings, Winter Tires, Coin Boost |
| Forest | Wings, Magnet Coin, Boost |
| City | Wings, Magnet Jump, Shocks |
| Mountain | Rollcage, Winter Tires, Coin Boost |
| Rustbucket Reef | Wings, Fume Boost, Coin Boost |
| Winter | Wings, Winter Tires, Coin Boost |
| Mines | Wings, Winter Tires, Wheelie Boost |
| Desert Valley | Wings, Jump Shocks, Landing Boost |
| Beach | Wings, Winter Tires, Coin Boost |
| Backwater Bog | Wings, Fume Boost, Coin Boost |
| Racier Glacier | Wings, Rollcage, Coin Boost |
| Patchwork Plant | Wings, Winter Tires, Rollcage |
| Sky Rock Outpost | Wings, Jump Shocks, Landing Boost |
| Forest Trials | Wings, Winter Tires, Rollcage |
| Intense City | Wings, Rollcage, Jump Shocks |
| Raging Winter | Wings, Winter Tires, Wheelie Boost |
Note!
Tractor Wars
If you would like to compete in tractor wars, make friends with Numpty
Note: he may unfriend you if you use another vehicle in the daily, and you will need to friend him again if you would like to re-join.
Results are reported on the tractor wars discord server
Additional reference information
Anything worth adding? dadahcr2@gmail.com or Discord dada#1710
Motocross Description by Deflorator
Description
In comparison to other vehicles as for example the rally car, the Motocross seems to be not as popular. The reason for this is pretty simple; it’s one of the first vehicles that you unlock, however, it is not a great vehicle to drive cups or Adventure with if it’s not fully maxed out. Especially in the beginning phases of the game you need to make sure to spend your coins well. So, players obviously rather spend money on cars that are more useful. When I started playing the game, there were only about 5 vehicles and the motocross was one of them. So, I spent all coins on all vehicles as there weren’t that many.
Advantages
The advantages of the motocross are to my mind the fun of driving it. You probably need it maxed out and have some higher-level parts to experience the full power and speed it can have. I think the way you can use the vehicle with Thrusters and the LB is unique and always fun to drive. It’s definitely a vehicle that is stronger when driving downhill, it can pick up a lot of speed when continuously activating the landing boost. It’s clearly a nice to have vehicle if you have the coins to spend.
Disadvantages
It’s really tough to use at the adventure mode as the engine is not super strong and the fuel is also quite small. It’s just not a vehicle to climb hills. Also, cups are quite hard to drive if it’s not maxed out.
Overall experience
I think everyone needs to decide by themselves if buying and upgrading the vehicle has any benefit. For me it was just the fun factor, but if you’re only looking to have a good vehicle to grind cups, the motocross is probably not the best choice. If you play Team Events, you will have to upgrade it at some point anyways.
**Deflorator contact and channel : **
- Discord: Deflorator#3946
- Youtube
Monster Truck Description by gutterbutter
Introduction
If I was to read a part about the monster truck, I think I would write it as such.
Once you reach level of gold (I don’t remember) and you see the gold window slide down and you really see this bouncing big wheeled wonder for the first time. You gotta ask yourself, what am I going to do with a monster truck?!. Well, if you need a vehicle which can bounce across ice flows with the greatest of ease. If you want a vehicle that uneven ground doesn’t upset too much. Monster truck is it.
Description, Advantages and Disadvantages
By upgrading this vehicle to it’s a maximum you will see a great increase in both speed and power. However, it is prone to try to put you on your head at takeoff if you are not careful.
This can be compensated for by using start boost. Or even possibly afterburner.
The fuel boost gives a great burst of speed at max and at the lower levels fuel boost for the monster truck is worth it spot in your 3 parts.
Coin boost on the monster truck is another excellent part used in both cups and adventure. This will give you a dramatic increase in speed per coin once it is max. But even at lower levels it makes a difference.
One part that you will use quite a bit during cup or season grinding is the wheelie boost. This wonderful part plays well with this vehicle as the nose likes to be off the ground.
It is very easy to raise the nose of this vehicle using the gas pedal, however you must be very careful up long inclines. The vehicle, if it does not have enough speed will go wheels up and the only way out is to stay on the gas and let momentum carry you around hopefully landing a backflip and continuing up. Or to use an alternating gas brake motion to “jump” the monster truck up the hill.
Jump shocks are not really used on this vehicle. If needed it could be a decent scrap opportunity, there are worse things to scrap.
Flip boost and air control are fun if used together on a level such as the moon where there is room to flip this elephantine vehicle around and where gravity is not pulling it down.
The roll cage is a useful item especially in a level from the mines. Or wherever you feel your head threatened such as the bubble tubes in Rustbucket Reef.
As I have said before water is not a monster truck’s friend however in the Rustbucket Reef levels this vehicle does well, however it is not the best. But there are less protected vehicles.
Winter tires is always a good upgrade for any vehicle.
Landing boost tends to slow this vehicle down because you must land with all 4 wheels to activate landing boost. This action alone will cause slow times in this vehicle.
Overcharge turbo is great speed increase provided you are able to stay in the gas pedal long enough for it to build then release. As the turbo is upgraded it will take longer for the buildup but the release is also worth the wait.
However, this vehicle has its own drawbacks, such as the same bouncy suspension and the lack of head protection. Now this vehicle can hold its own on almost all levels. However, you do need to stay out of the water, do not try to cross under alligators, go right over the top, going under will end badly.
Monster Truck recap
The monster truck is an all-around beast. It is good for getting over obstacles and is great on the ice things in the water on maps like winter and raging winter.
The vehicle is not great until you get it near the max level. Before that, it is way too unstable. However, once you get it there it is very good.
The biggest drawback is it has bad roof protection. Maps like Mines and Rustbucket Reef are bad for this vehicle. Another thing is you should always go over the alligators in Backwater Bog
| Must haves | Useful | Rarely used |
|---|---|---|
| Afterburner • Coin Boost • Fume boost • Magnet • Thrusters • Wheelie Boost • Wings | Fuel Boost • Heavyweight • Jump Shocks • Overcharged Turbo • Rollcage • Start Boost | Air Control • Flip Boost • Landing Boost |
**gutterbutter contact : **
Discord: gutterbutter#0267
Rally Car Description by Cole ST
Advantages of Rally Car - Good in adventure and cups
Disadvantages of Rally Car - Kind of expensive, grip is low and needs good parts to be great
Why it is different than other vehicles - It is an easy vehicle for beginners
Description
The vehicle comes with 1 paint and 2 wheels default and has a total of 18 paints. It is everyone’s favorite cup vehicle. Fast, reliable and with a strong roof to protect your head. Great for racing, awesome for adventure mode (with wings) and great at hill climbing too. Thrusters are awful.
| Must haves | Useful | Rarely used |
|---|---|---|
| Afterburners • Coin Boost • Fume Boost • Landing Boost • Overcharged Turbo • Wings • Winter Tires | Fuel Boost • Magnet • Start Boost • Wheelie Boost | Air Control • Flip Boost • Thrusters |
Note!
Rally Car has Secret Start
If you want a better start, hold the throttle until the timer says 1 and then let go until the race starts giving you the Secret Start. At the start of the race, you want to hold the throttle. You hold it until the clock reaches 1 (because of reaction time you might want to let go at the end of 2). Once you let go you don’t want to press gas until the race starts (again reaction time so at the end of 1). The game won’t say perfect start because you let go directly behind the green area (if you did it right) but it is faster.
Video explanation of the Secret Start
Reliable Rally Car setup for driving Adventures:
| Adventures | Rally Car Setup |
|---|---|
| Countryside | Winter Tires, Coin Boost, Wings (alternates: Fume Boost instead of Coin Boost) |
| Forest | Wings, Coin boost, Landing Boost (alternative: Jump Shocks, Landing Boost, Wings) |
| City | Winter Tires, Wings, Jump Shocks (alternates: Coin Boost or Magnet instead of Jump Shocks) |
| Mountain | Winter Tires, Wings, Coin Boost (alternates: Fume Boost instead of Coin Boost or Wheelie Boost instead of Wings) |
| Rustbucket Reef | Coin Boost, Fume Boost, Landing Boost (alternative: Jump Shocks, Landing Boost, Wings) |
| Winter | Winter Tires, Wings, Coin Boost (alternates: Fume Boost instead of Coin Boost) |
| Mines | Winter Tires, Wings, Landing Boost |
| Desert | ValleyFume Boost, Overcharged Turbo, Coin Boost (alternative: Jump Shocks, Landing Boost, Wings) |
| Beach | Winter Tires, Wings, Overcharged Turbo (alternates: Coin Boost instead of Winter Tires) |
| Backwater Bog | Jump Shocks, Landing Boost, Wings |
| Racier Glacier | Jump Shocks, Landing Boost, Wings |
| Factory | Winter Tires, Wings, Jump Shocks |
Rally Car Setup for Special maps
| Special maps | Rally Car Setup |
|---|---|
| Moon | Jump Shocks, Landing Boost, Wings |
| Forest Trials | Jump Shocks, Landing Boost, Wings |
| Intense City | Winter Tires, Wings, Jump Shocks |
| Raging Winter | Winter Tires, Wings, Jump Shocks (alternates: Coin Boost instead of Jump Shocks) |
**Cole|ST contact and channels:
Different Driving Techniques
This section of the Game Manual will try to explain different driving techniques, how you can learn them and master them more easily.
In progress ………
It will be included in the upcoming edition of the Game Manual
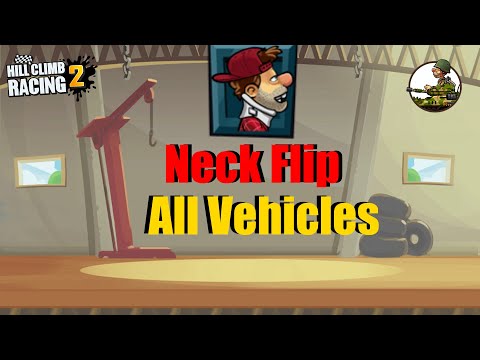
Daily Task – Neck Flip Task
The newest update for Hill Climb Racing 2 V1.43.0 introduces us to all-new daily tasks for bonus rewards and additional progress on the trophy road. An everyday player is given three tasks to complete and the most difficult task to complete is Neck Flip.
This link will show you how to do Neck Flip with all vehicles in the game:
How to do a Neck Flip
Chapter 2 - In-game resources
In Chapter 2, we will explain what the game resources are and try to describe how to manage the in-game resources. How to earn them, collect them, and how to use them most effectively in building your HCR2 Account. We excluded VIP Subscription in our explanations and base our data only from gathering resources within the game. (In this first edition it is based on earning, collecting, and using Gems. The Gems are the most valuable commodity in the game.)
NOTE 2×!
Aero’s Monitoring Spreadsheet
A very good tool for developing your HCR2 Account aka Bill Newton is Aero’s HCR2 Monitoring Spreadsheet. By using this tool, you can easily follow your in-game progress, make plans on how to spend Coins on vehicle features and tuning parts, and etc.
For downloading this spreadsheet use this Reddit link!!
Game Resources

Coins - Coins are the primary currency in Hill Climb Racing 2. They are used for purchasing vehicles, vehicle upgrades, upgrading tuning parts, and unlocking new adventure maps (if you don’t want to reach a certain adventure rank to open an adventure map).

Gems - Gems are the premium, secondary currency in Hill Climb Racing 2. Gems can be purchased with real money or earned in-game by opening a
Free 6 and 8 Hours Chest, by winning Daily Chest (10 Cups win tracks per day), by reaching weekly Team Chest level 23 for a maximum amount of them, by Team Event winning at least 2600 points, by opening Daily Rewards or by driving Adventure Task Chests. You can trade gems for coins in the store as well as use gems to unlock chests faster thereby speeding up the scrapping process. Gems can also be used to purchase event and special adventure maps tickets and challenge retries.
Note: you can create a team for 100 gems or change the team name for 50 gems. (Our advice is: Don’t spend Gems on this if you do not have VIP Subscription)
 Scrap - Scrap is used exclusively to craft an upgrade for tuning parts. To craft a tuning part upgrade, you must already have at least one of that part in your inventory and unlock the vehicle that you want to upgrade the tuning parts. Scrap is created by taking unwanted tuning parts and converting them into scrap, which you can then spend on upgrading the parts you do want. Scrap can also be gained from Team and Public Event rewards.
 Special Ticket - Special tickets can be used as an alternative entry method where a ticket is required. These are the only alternatives that allow you an entry to Team Events when your “Team Tickets” are all used up (assuming the ad-entry is used) and can be match deciding. You can also use them to retry 1 track in a single run, but keep in mind that the cost of a retry is doubled every time you use it, so the first retry costs 1 ticket, then 2, 4, 8…
In Public Events you can use 1 special ticket to race once (not refill). The only way to obtain these tickets regularly is by having a team score of 1400+ or sometimes 300+ in a Team Event match. There are also some Public Events have them as rewards.
 Team Ticket - Team Tickets can only be used to race in Team Events. Upon starting your match, you will have 2/2 team tickets. These are refilled once every 4 hours, starting the minute of your match. Your refill will delay if you don’t use them in that time window.
The only way to obtain these tickets is by waiting for the timer to run down.
 Event Ticket - Event tickets are used to purchase an attempt in the Public Events. You are given 4 tickets (trials) per day and 1 free ticket (trial) for watching ads video. Additional tickets can be bought with gems at a cost of 4 tickets for 20 gems. In the Soccer Run Event, you only get 2 tickets, both after waiting for the tickets or purchasing them with 20 gems.
 Special Adventure Maps Ticket - One ticket gives you one chance to drive as far as you can in Special adventure map. You start out with 4 tickets. These tickets get refilled every 24 hours, after they are all spent. They can also be manually refilled by spending 50 gems for 4 tickets. You can use a Special Ticket for additional runs or watch an ad, when available.
How to collect effectively and use Resources
How to collect and use Gems
Gems are a crucial commodity in the game because you can only collect a certain quantity of them on a monthly basis or you can buy them for real money. Our goal is to show you the way how to earn and collect Gems without buying them for real money, and also how to invest them into the game.
Gems are very hard to collect, but they can be very easily spent !!
With patient collecting and smart spending of Gems a lot can be done in the game. Don’t quickly and hastily buy Chests or daily offers of Rare and Legendary parts in the Shop.
A smarter move is to “obsessively” keep the Gems until you collect enough of them, and only then, in an exceptional situation, buy only the Legendary part, only in the case of a larger amount of collected Gems.
How to collect Gems
The question that many players will ask:
- How I can earn and collect Gems without buying them for real money?
- What are the in-game source for the Gems?
- Etc.
The answer to all these questions is as follows.
There are 9 ways to earn Gems. 6 different types of Chest in the game give you Gems, you can earn Gems by completing the monthly Trophy Road, by opening Daily Rewards and in Team Event by winning a minimum of 2,600 Points.
| SOURCE | DESCRIPTION |
|---|---|
| Monthly Trophy Road | You can collect 150 Gems per month by driving Trophy Road. |
| 6h Free Chest | 6h Free Chest gives a minimum of 1 Gem every 6 hours by watching an add every 6 hours. |
| 8h Free Chest | 8h Free Chest gives a minimum of 1 Gem every 8 hours. |
| Daily Chest | Daily Chest gives a minimum of 2 Gems. It means that after you get 10 wins in Cups race, the chest will be locked and must wait for the next day. |
| Daily Rewards | Tap on the “Collect” button that appears when you join the game each day. If you keep this up for 7 days, you will get a Rare chest as a reward. After a 7-day streak, the progress will restart. By collecting all rewards, you can earn 40 Gems per week (Day 3, 4, 5, and 6 contain Gems. Note: At Christmas time, all the daily rewards you normally get will be doubled. The Rare chest will be replaced with a Champion chest. |
| Adventure Task Chest | Collect additional Gems by driving 3-times Adventure Task Chest every 12 hours. You can win a maximum of 8 Gems per Adventure Task Chest. In the calculation of the Gems, in consideration is taken earning a 1 Gem per Adventure Task Chest. |
| Team Event | Depending on the Week (one Week you can Match 3-time same Team Event and next Week you can Match 4-time same Team Event) and your Team needs to reach a minimum of 2600 Points in the Match to win 30 Gems. |
| Team Chest | This Team Chest can be leveled up by the distance the entire team drives in 7 days. By leveling up the Team Chest, you can earn more Gems. You need to be a member of a team that can reach Team Chest level 23, so you can collect a maximum of 50 Gems per week. |
| Public Event Chest | When reaching 250 points in the Public Event you will be rewarded with Public Event Chest which contains 143 Gems per week.*This type of Chest appears in special Public Events. Not a common reward in the Public Event. This Chest and amount of Gems are excluded from calculation!! |
In a month you can collect a minimum of 1320 Gems.
To collect this number of Gems you need to fulfill these conditions to be able to earn 1320 Gems:
- Per day you need to open 3×6h Chest + 2×8h Chest + 1×Daily Chest + 6×Adventure Task Chest = 13 Gems
- Per week you need to collect:
- Daily Rewards (Day 3,4,5 & 6) = 40 Gems
- Team Chest level 23 = 50 Gems (if your Team do not reach level 23 you will earn fewer Gems than 50 pieces
- In Team Event by winning over 2.600 Points = 30 Gems (in a month your team can join 14 matchmakings of a Team Event)
- Per month you can earn 150 Gems by completing Trophy Road
With a simple mathematical equation in a month, you can collect 1320 Gems
30×(3×1+2×1+1×2 +6×1) + (4×40+4×50+14×30) + 150 = 1320
30 days × (13 Gems) + (4 × Daily Rewards + 4 × Team Chest Road + 14 × Team Event) +150 Trophy Road =1320
Additional Adventure Task Chest explanation
By playing every day the Adventure Task Chest can give you more than 1320 Gems. After you open the three Adventure Task Chest, you will need to wait 12 hours to be able to do it again.
Adventure Task Chest Information:
| COINS | GEMS | ITEMS |
|---|---|---|
| 1000 coins for starting the adventure + 400 for every level reached. So a Level 1 chest will contain 1400 coins, Level 2: 1800 and so on… This has no maximum level cap. | 1 gem for starting + 1 gem every 4 Levels reached. So a Level 1 chest will contain 1 gem, Level 4: 2, Level 8: 3 and so on… This has a maximum level cap of 28, meaning you can get a maximum of 8 gems in every task. | Levels 1-6: Minimum of 18 common and 2 rare parts. Levels 7-12: Minimum of 29 common and 2 rare parts. Levels 13+: Minimum of 45 common and 6 rare parts. |
For the hard map, (Forest Trials, Intense City and Raging Winter), the adventure awards differ as follows:
| COINS | GEMS | ITEMS |
|---|---|---|
| 1000 coins for starting the adventure + 200 for every level reached. So a Level 1 chest will contain 1200 coins, Level 2: 1400 and so on… | 1 gem for starting + 1 gem every 5 Levels reached. So a Level 1 chest will contain 1 gem, Level 5: 2, Level 10: 3 and so on… | Levels 1-5: Minimum of 18 common and 2 rare parts. Levels 6+: Minimum of 29 common and 2 rare parts. |
Gems collecting recap
Always finish the monthly Trophy Road to earn 150 Gems.
You need to open a 2×8h Chest, 3×6h Chest, win 10 Cups for opening a Daily Chest that gives you a minimum of 2 Gems per day, drive every 12 hours 3-times Adventure Task Chest, earned a minimum of 6 Gems per day. Overall, it is a minimum of 13 Gems per day. In reality, you will get more Gems than the minimums indicated.
In a month that is a minimum of 390 Gems
Always open Daily Rewards that is 40 Gems per week or 160 Gems per month + be a member of a team that can reach Team Chest level 23 (8.360 km) so in that way, you can earn 200 Gems per month + be a member of a team that can reach a minimum of 2.600 Point in all of the 14 Team Event matches that can be played per month, so that you can earn 420 Gems per month. Overall combined, the minimum monthly amount of Gems that the game gives you is 1320 Gems.
If your team is not strong enough to meet the requirements of the last two tips, you will earn fewer Gems. For better and faster building your Account, join another active team that can reach all these conditions.
How to use Gems
A big mistake that players will make is to use Gems in the in-game Shop to buy Rare, Epic, or Legendary Chests (“normal” Chest or a specialized Chest or one of the vehicles).
It is also inadvisable to spend 250 Gems for buying 5×Epic Parts or 500 Gems for buying 1×Legendary Part in a daily offer.
But the biggest mistake is to buy Coins with the Gems. It is the worst way to spend Gems, it’s the most inefficient thing to do in the game with Gems.
It is better to use them to open Cups Chests or use them to purchase Public Events retries. You can also use them on special adventure maps and challenge retries attempts, but that way you won’t get the necessary advantage in building your Account.
Next two tables will show you why it is not worth spending Gems for buying different Chest and daily parts in the in-game Shop.
First table is showing how many coins and parts you can get when spending Gems to buy Chests in the in-game Shop.
| DATA SOURCE | GEMS SPENT | COINS COLLECTED | COMMON PARTS | RARE PARTS | EPIC PARTS | LEGENDARY PARTS | SKIN |
|---|---|---|---|---|---|---|---|
| Vereshchak | 7800 | 168500 | 740 | 98 | 60 | 12 | 0 |
| io&oi | 3000 | 154000 | 479 | 78 | 9 | 3 | 10 |
* Vereshachak’s and io&oi’s data have been taken from their youtube channels
Vereshchak: Hill Climb Racing 2 OPENING CHESTS Rare, EPIC, LEGENDARY (-7800 gems)
io&oi : OPENING 25 CHEST 120 EACH - HILL CLIMB RACING 2
Second table shows how many Gems you need to spend if you open every chest in the Chest Sequences for Cups. The Sequences consists of 111 Chest from start of the Sequence with Champion Chest to the start of the next Sequence with Champion Chest
| DATA SOURCE | GEMS SPENT | COINS COLLECTED | COMMON PARTS | RARE PARTS | EPIC PARTS | LEGENDARY PARTS | SKIN |
|---|---|---|---|---|---|---|---|
| Legolinjo # 1 | 1884 | 567250 | 3204 | 434 | 57 | 9 | 0 |
| Master HCR | 1884 | 570500 | 3237 | 431 | 42 | 12 | 1 |
| Legolinjo # 2 | 1041 | 559000 | 3266 | 452 | 66 | 6 | 0 |
* Master HCR data has been taken from his youtube channel, and data I have collected by opening all Chest Cups and second data is while opening only Common Chests and during earlier opening of the other Chests in one Sequence rotation.
Master HCR: HCR2 Hill Climb Racing 2 | HOW much MONEY and TUNING PARTS I Won | OPENING ALL CHESTS IN CUPS
Gems spending recap
When I started playing the HCR2 game, I used to spend Gems on opening Chests and daily offers in the in-game Shop, but I quickly stopped spending Gems in that way.
It turned out that one of the best way for spend the Gems is only to open Cups Chests by decreasing the time on each Chest before they can be opened with a help of Gems. For example, I always let the Champion Chest run out of time and then I open it for free. Epic, and Rare Chests I open them when they cost only 12 or less Gems. Common Chest I almost always open right away. Opening them this way I manage to collect a lot more Coins as well as all the other parts needed to build my Account.
In upcoming Manual editions, we will make additional explanations about Gems spending on earlier Cups Chest opening (it would be in the Chest section) and on additional attempts in Public Events (this edition in Public Event Chapter contains description on how to spend Gems in Public Events).
How to collect and use Coins
In progress ………
It will be included in the upcoming edition of the Game Manual
How to collect and use Scrap
In progress ………
It will be included in the upcoming edition of the Game Manual
How to collect and use Special Ticket
In progress ………
It will be included in the upcoming edition of the Game Manual
Chapter 3 - Maps and Cups
In progress ………
It will be included in the upcoming edition of the Game Manual
Chapter 4 - Public Event
In Chapter 4, we will try to analysis Public Event tracks and give you guidelines how to drive the Public Events most effectively.
Because of the envisioned idea of how this Chapter will look like, we will try to make every week a Public Event bulletin.
For now, this selection of the Public Event Chapter will describe what Public Events are, what is the rules for Public Events and why is one of the smarter moves to spend Gems on the Public Event and how much Gems you need to spend (you will need to able fulfill some conditions first).
Public Event Intro
Public Events are limited-time events that offer special challenges, activities and rewards that you may not get elsewhere in HCR 2. These challenges can range from long jump to time attack to seasonal themed celebrations. Public Events start on Wednesday and end on Monday. To access the current timed event, tap the Events icon on the game interface. This will take you to the event menu. Each event has its own rules and conditions for victory, which will be explained there. If there is a countdown displayed here, it means you need to come back when the countdown is over to play the next event as it begins.
You will be given 4 free Event Tickets and one Ticket by watching video ads every day during the event. When you run out of Event Tickets, you must wait 24 hours for your free tickets to restock, or you can buy additional tickets instantly for 20 gems.
Note: Special time dependent events like Christmas or Halloween last longer than other weekly events. Regularly they last 12 days
Spending Gems in Public Event
A smart way for spending Gems is in Public Events because you can spend fewer Gems to open a Legendary Chest and win 3×Legendary Part. With a small help of mathematics, we will present to you how much Gems you need to spend in Public Event.
For this presentation, you will need to fulfill some conditions. In the end, the exact amount of Gems spent in a Public Event is dependent on how many Points player wins in every Public Event rides (the presentation will have different scenarios so that you can easily manage your Gems).
One Public Event lasts for 6 days (from Wednesday to Monday) and for maximum attempts in the Public Event, the player needs to enter Public Event immediately at the beginning of the Public Event. In that way, a player has a maximum of 30* attempts in a Public Event without spending any Gems.
* (4 free Tickets + 1 additional for ads watching per day) × 6 days = 30 overall attempts
Example 1 (Legendary Chest 400 Points):
If a player can win 8 Points per Ticket, he will need to spend 100 Gems for reaching 400 Points in the Public Event and win the Legendary Chest.
6 days × 5 free Tickets × 8 points per Ticket = 240 Public Event Points
20 Gems = 4 additional Tickets
4 additional Tickets × 8 points per Ticket = 32 additional Event Points
100 Gems = 20 additional Tickets
20 additional Tickets × 8 points per Ticket = 160 additional Event Points
Overall; 240 +160 = 400 Points = Legendary Chest
Example 2 (Legendary Chest 400 Points):
If a player can win 5 Points per Ticket, he will need to spend 260 Gems for reaching 400 Points in the Public Event and win the Legendary Chest.
6 days × 5 free Tickets × 5 points per Ticket = 150 Public Event Points
20 Gems = 4 additional Tickets
4 additional Tickets × 5 points per Ticket = 20 additional Event Points
260 Gems = 52 additional Tickets
52 additional Tickets × 5 points per Ticket = 260 additional Event Points
Overall; 150 +260 = 410 Points = Legendary Chest
Example 3 (Legendary Chest 500 Points):
If a player can win 8 Points per Ticket, he will need to spend 180 Gems for reaching 500 Points in the Public Event and win the Legendary Chest.
6 days × 5 free Tickets × 8 points per Ticket = 240 Public Event Points
20 Gems = 4 additional Tickets
4 additional Tickets × 8 points per Ticket = 32 additional Event Points
180 Gems = 36 additional Tickets
36 additional Tickets × 8 points per Ticket = 288 additional Event Points
Overall; 240 +288 = 528 Points = Legendary Chest
Example 4 (Legendary Chest 500 Points):
If a player can win 5 Points per Ticket, he will need to spend 360 Gems for reaching 500 Points in the Public Event and win the Legendary Chest.
6 days × 5 free Tickets × 5 points per Ticket = 150 Public Event Points
20 Gems = 4 additional Tickets
4 additional Tickets × 5 points per Ticket = 20 additional Event Points
360 Gems = 72 additional Tickets
72 additional Tickets × 5 points per Ticket = 360 additional Event Points
Overall; 150 +360 = 510 Points = Legendary Chest
Chapter 5 - Team Event
In this Chapter, we will try to analyze with instructions and guidelines all the tracks that can be driven in Team Events. All tracks will be sorted according to the surfaces on which they are driven, e.g. City, Mountain, Beach, etc.
Similar to the Public Event, the envisioned idea is to analyze all the tracks that are in Team Event, so we will try to make every week a Team Event bulletin. Below is a whole analysis of one track and the goal is to make a similar analysis for all Team Event Tracks.
At the end of each team event, you will be eligible to collect prizes depending on how many points your team was able to obtain. A maximum of nine prizes can be collected and the Top Prize will be yours only if your team wins the event.
| POINTS | REWARDS |
|---|---|
| 300 | Common Chest |
| 600 | 10.000 Coins |
| 1000 | 500 Scrap |
| 1400 | +1 Ticket |
| 1800 | Uncommon Chest |
| 2200 | 20.000 Coins |
| 2600 | 30 Gems |
| 3000 | 1.000 Scrap |
In addition, the Winning Team’s Prize is a Rare Chest
Types of Team Event tracks:
Backwater Bog
Beach
City
Countryside
Desert Valley
Forest
Mines
Moon
Mountain
Patchwork Plant
Racer Glacier
Rustbucket Reef
Winter
Analysis of Backwater Bog Type of Tracks
Backwater Bog Multi Jump/Distance = 1100 m / 10.000 Points (the appearance of this Backwater Bog track was in No Relation Team Event, 22-JAN-21)
The best vehicle to ride this track: Hill Climber
| Vehicle features: | Parts: |
|---|---|
| ENGINE 20 / 20 MAX | WINGS Level 15 Max |
| GRIP 20 / 20 MAX | JUMP SHOCKS Level 10 Max |
| SUSPENSION 20(18) / 20 MAX | LANDING BOOST Level 7 Max |
| AWD 20 / 20 MAX |
How and where to practice this track?
This track can be practiced on a Backwater Bog Adventure track!
Note!
When practicing this track try to avoid getting Fuel.
Track Analysis: In progress ………
Analysis of Beach Type of Tracks
Beach Wheelie = 700 m / 10.000 Points
(the appearance of this Beach track was in Drift Hard Team Event, 08-JAN-21)
The best vehicle to ride this track: Dune Buggy
| Vehicle features: | Parts: |
|---|---|
| ENGINE 20 / 20 MAX | MAGNET Level 15 Max |
| GRIP 20 / 20 MAX | WINGS Level 15 Max |
| SUSPENSION 20 / 20 MAX | COIN BOOST Level 4 Max |
| ROLLCAGE 20 / 20 MAX |
How and where to practice this track?
This track is only accessed in Team Event! You cannot practice this track outside Team Event!
Similar tracks for practice: Beach Adventure, all Beach type Cups, and Uphill Cup
Track Analysis: On about 103 m is a first major obstacle
At about 103 m there is the first problem. The Buggy needs to drive slowly and carefully so that the 105 m break can pass without a big overflight. You must be as close to the ground as possible because after it comes to a segment where you must have good trajectory to skip the “hole”.
After the “hole” comes a short section where you need to be careful not to lose balance over the Buggy to fly over the second “hole”. After flying over that “second” hole, try to stay perpendicular as possible to the hill you need to land on.
From 215 m to 270 m is a segment of the track where you are going up and you need to practice wheelie on the Mountain track to “master” wheelie techniques.
At approx 270 m to 300 m is another hole and section (from 300 m to 350 m) of track where you are going up.
From 350 m to approx 440 m is the easiest section of the track.
From 440 m to 510 m it is a similar section like it is on the first “problem” - (from 103 m to 169 m)
After 510 m it’s easy to control Buggy.
At 614 m to 680 m is again a similar section like at 103 - 169 m and 440 - 510 m
After 680 m you have a small flat area before you need to fly over the last “hole“ to reach more than 700 m for 10k points.
*Source – Vereshchak youtube video (Hill Climb Racing 2 - 39013 points in DRIFT HARD Team Event)
Analysis of Mine Types of Tracks
Mines Multi Jump/Distance = 270 m / 10.000 Points (appearance of this Mines track was it in Seasons Tears, 15-JAN-21)
The best vehicle to ride this track: Hill Climber
| Vehicle features: | Parts: |
|---|---|
| ENGINE 20 / 20 MAX | WINGS Level 15 Max |
| GRIP 20 / 20 MAX | JUMP SHOCKS Level 10 Max |
| SUSPENSION 20 / 20 MAX | LANDING BOOST Level 7 Max |
| AWD 20 / 20 MAX |
How and where to practice this track?
This track is only accessed in Team Event! You cannot practice this track outside Team Event!
Similar tracks for practice: Mines Adventure, all Mines type Cups
Note!: Practice the first Jumping driving technique in Mines tracks to get a feeling of how to control Hill Climber in a closed space. Mine Shaft Cup - A
Flat Miner is best for practice Jumping
Track Analysis: In progress ……..
When you start this track a simple trick can be very useful. Wait a few seconds so that other “ghost players” begin their ride, in that way they will not interfere with your ride. Start track easily and “jump” before the Red-start flag. Try to follow the green trajectory.
Use extended Jump Shocks to overcome the first curve on the track.
This link will show you how this track looks like in one big picture made of many slides

*Source – Vokope youtube video (Hill Climb Racing 2 - 37185 + 4 Free Tickets (Seasons Tears))
Chapter 6 - Game Guidelines
In this chapter, we try to give you guidelines on how to play a game without spending real money. Everything depends on your answer to the following question:
What type of player I want to be?
If you want to play casually, without team events stress, just for the time to pass away while you are in the waiting room, then you do not need any guidelines. BUT if you want to play active and one day be in one of the Top teams this can help you.
First, two things you need to familiar with Hill Climb Racing 2 game is:
- You will need to use a lot of time to progress in this game. At the beginning of the game, your progress will be almost exponential, but later in the game, you will need a lot of time to collect enough parts to be able to upgrade a part to the next level.
- Do not cheat or use a game exploit. Do not breach EULA rules. You will be banned from the game or you can jeopardize your team to be rest or banned.
The following Game Guidelines will help you play HCR2 without a VIP Subscription:
- At the beginning of the game when you create you HCR2 Avatar (or Bill Newton) connect with Facebook and/or Google so that you can save your in-game progress
- When you start driving the first tracks, follow game instructions, but NO NOT open first of three 15’s Chests. Instead keep driving all three of the initial tracks to gain three 15’s Chest, then activate them by Tap to Unlock, and when all three Chest have a status of OPEN then open them. These first 15’s Chest are special and will give you Epic parts. (This is not so crucial to do but every part is valuable)
- Save your Coins and Gems for later in the game!!!! Spend them rationally!!!
- Use all free gifts/offers which Finger Soft provide you:
- First 5 vehicles feature level upgrade for free (available every 3 h)
- Common Parts - first five level upgrades for free (available every 3 h)
- Rare Parts - first three level upgrades for free (available every 3 h)
- Every 12 hours 6 free Common Chest (3h Chest) Every vehicle you buy, Fingersoft gives you free vehicle feature level upgrades and Common + Rare parts free level upgrades. Exploit them all before you start investing Coins for upgrade features and parts levels.
- Drive every Cups with Magnet part to collect as many Coins you can + every time when you can make a backflip or front flip or any kind of stunts to earn additional Coins.
- Install Discord program. Go to Settings and left from Facebook icon you will see Discord icon, tap on it and install Discord on your smartphone, and you can download and install Discord App on your computer also. HCR2 has a vibrant Discord community that can help you and your game progress.
-
As soon as you reach the rank of Gold I the option to join a team becomes available, consider joining one of many HCR2 teams. Smart thing is to choose one of Top team who have low ranking teams, for beginners. You can easily search in official Finger Soft HCR2 Discord server in the #team-seeking-player ads from teams that need active players. Also, try and finish the monthly Trophy Road as soon as possible. By completing this in a very short time you can receive:
150 Gems
86.000 Coins
254 Common Parts
78 Rare Parts
43 Epic Parts
13 Legendary Parts
5 Skins - When you in a team, ask for help for example which vehicles to buy or which parts need to be upgraded first. Almost all teams are Team Event based teams so listen to what experienced players have to say and learn from their mistakes.
- When you drive Adventure maps, drive a Mountain map because that map has the most Coins per meter + you can make stunts for additional coins.
- Whilst in a team try and drive as many kms for Team Chest. Being a member of a team who can reach minimum Team Chest level 23
(With Team Chest Level 23 8,360 km you win: 112,000 Coins; 50 Gems; 113 Common; 12 Epic and 3 Legendary Parts)
Don’t expect to be accepted into a team if you have a low GP (beginner) and you are asking for Team Chest over Level 35+ be realistic and work your way up - Being part of a winning team in Team Events with a minimum of 2,600 Points for 30 Gems rewards. If you are part of a team with not enough players who can reach a minimum of 2,600 Points in a Team Event, find a new team with more members.
- Do not scrap parts in the beginning. Collect them. If you need Scraps to upgrade a particular part, seek advice from experienced teammates who will advise which Parts eventually can be scrapped safely.
-
Do not spend hard-earned Gems to buy 5 x Epic (250 Gems) or 1 x Legendary (500 Gems) parts in the in-game Shop. It is not worth spending that number of Gems. You are better off spending Gems to open Common Chest (12 Gems) or in Public Event for additional 4 attempts as you will receive more rewards.
- Tickets that you get as Reward in Team Event or Public Event use only to improve your score in Team Event only when it is needed. If your team has a secured win or you are losing Team Event and if you are not able to change the outcome, do not spend Tickets. Save them for the time when you can change the outcome of a Team Event.
How many Gems, Coins & Scraps you can earn per Month?
- Gems = minimum of 1,320 Gems
- Scraps = minimum of 21,000
- Coins = It all depends on how much free time you can set aside to play the game but with sensible use of Gems a month you can collect 4,000,000 Coins
- Ticket = minimum of 14 Tickets (without Public Event, if your team win a minimum of 1,400 Points in Team Event)
Daily Checklist
This list can help you track all tasks in the game for the better and more efficient playing of the game, building your Garge Power, and improve your driving skills.
- Every 3 hours: Free FS upgrades – use them to upgrade your newly bought vehicles and Common and Rare parts. Free upgrades are limited and depending on the level of upgrades.
- Every 4 hours: 2 free Team Tickets – play Team Event
- Every 6 hours: Free Ads Chest in the Shop – open it
- Every 8 hours: Free Chest in the Shop – open it
Every 12 hours
- Free 6 Common Cup Chests – drive Cups and open Chests
- 2 Free “Finish Now” Scrap – use it for any excess scrap
- 3 Adventure Task Chests – drive it
Every 24 hours
- Collect Daily Reward
- Use Double Coins in Adventure Maps – collect as many as possible Coins
- 3 Daily Tasks – complete it
- Win 10 Cup racers – drive it, win 10 cup races
- Additional Team Event Ticket for free – use it sometimes keep it for the next match if it isn’t going to make a difference for the current match and the next match is likely to start before the ticket resets
- 4 Free + 1 ads Public Event Ticket for free – use it if the Public Event is available
- 4 Free + 1 ads Special Adventure Ticket for free – use it
- 10 Free attempts at the Daily race - use it if you compete against others in the daily race. Can help you to improve your driving skills.
Weekly
- 10 Free attempts at the Weekly race – use it if you compete with others in the weekly race. Can help you to improve your driving skills.
- Team Chest – open it
Always
- Have a Cup Chest timing down
- Scrap excess parts
Chapter 7 - Devices and Support
In Chapter 7, we will try to help HCR2 players with decisions on what devices are better to play HCR2, on the smartphone, or on the tablet.
Also, we will try to help with some technical issues within a game. All pieces of information described in this chapter are based on player’s experience and are not official Finger Soft interpretation. For official help regarding problems within a game contact support@fingersoft.com.
In every new edition of the HCR2 Game Manual with a help of HCR2 players, we hope that we will explain most of the technical issues within the game. Please contact us if you have problems with a game or have experience with solving some issues in the game.
How to transfer Account from old device to new device
(only for Android users)
Follow these 4 steps instructions on how to transfer your HCR2 Account to the new device. Many players have made mistakes with transferring their HCR2 Account from an old device to a new device and lose their Account. These 4 instructions had been proofed many times. For more safety with transferring Account from the device to the device, connect your HCR2 Account on both save cloud options – Google and Facebook.
- First, on your old device connect the HCR2 game with Google Play and/or Facebook Account. If you haven’t been connected before, connect now. Also, on your device tap on the Sync icon. Play the game for a few minutes, open some Chests, Exit and Enter in the game a few times so that cloud can recognize your connections. Exit the game.
- On the new device first install all programs that are needed (Google Play, Facebook, Gmail), and connect yourself with Google Play and/or Facebook Accounts. Tap on the Sync icon on the new device. Then install the HCR2 game on the new device.
- Enter the game on the new device, drive the initial tutorial in the game, this is by default. After the first two tracks, the game will ask you to connect to Google and/or Facebook Account. Make the connections with Google and/or Facebook Acc. The game will ask you do you want to connect with existing data to the cloud or to start a new game. Choose connection with existing Account on the cloud. In that way, you will “pull” everything from the old device to the new device.
- Enjoy playing HCR2 on the new device with data from the old device.
Smartphone or tablet?
Devices do actually make a difference.
An Android device is fine to play on, it doesn’t cost much money most of the time. OnePlus’ would probably be the best Android device to play on since they have a lot of RAM storage and a good processor. The lag can also cause some of your files in the game, and it’s because of the small amount of your RAM storage. There is also sometimes a pretty high latency of touches on Android devices, this means that when you push on the pedals, there is a very small moment of latency of about 50-100ms, and you cannot fix it, you can only upgrade it if you buy a more powerful Android device, or you can try to clear your cache of the game (which are all the useless packets) or optimize your device in your device settings.
An iOS device would probably the best device to play on. It has a super small latency (0ms) / touches sensitivity and it also has a great chip inside the device which makes your game run very smoothly and with no lag at all (and as I said previously, lag causes most of the fails in the game).
There is also a rumor that says tablets are the perfect devices to play on, and it’s true! Tablets have a larger screen, bigger resolution and for example, iPads which have a more square screen, you can see more things on your screen as instead of stretching horizontally, it stretches vertically.
Players experience with the tablet
As a person who uses a tablet, I can say that it is the better device to play on because of better resolution. It means you can see way more things, coming your way. As in the case of the Long jump track, the Bus on the phone usually flies right off the screen, but in the case of a tablet, I can usually keep it on the screen perfectly and it is great for seeing an obstacle coming ahead down of the ground since you will be able to see it. Unlike a phone where in some cases you might need to completely guess where the next obstacle is.
The Bus problem on Long jump tracks
When playing with a Bus the Long jump Team Event track on the smartphone you can experience a limited visibility of the Bus. Some portions of the Bus are not visible enough.
To fix that problem, you should push the Pause button. It helps bring the bus back on the screen.
Chapter 8 - Source
Chapter 8 will contain a list of our sources for the Game Manual. Some information is easily available on the Internet (websites or on Youtube), some information and text have been provided by players. We do not reserve the rights to copyrights. Everything in the Game Manual is a free source. The goal of the Game Manual is to help Hill Climb Racing 2 players and not to run lawsuits :-)
Source list
Hill Climb Racing 2 Official wiki:
HCR2 players (sort by alphabet)
- Aero
- Cole|ST
- CU Marko
- dada
- Deflorator
- Flash
- gutterbutter
- iLeapsy
- Legolinjo
- The Doc
Youtube channels (sort by alphabet)


